
Difficulty: Easy ★★☆☆☆

You will need:
- a stocking template
- felt in various colours (depends on template choice)
- embroidery floss in a complimentary colour
- permanent markers and/or fabric paint (depending on template choice)
- hot glue gun/ glue sticks
- scissors
- pen or chalk (to mark fabric)
- large eye hand sewing needle
- pins
- craft knife (optional)


First you will need to choose a template design and print it out. Templates can be found here. Once you have it printed, cut out the stocking piece.


Trace the stocking template onto your main felt colour. You will need to trace the template 2 times for back and front of stocking. Cut out both stockings. Also measure and cut a strip 3" x 1/2" for the hanging loop.


Cut out the main design. Details and inner pieces will be dealt with later.


Trace your design pieces on appropriate colour felt, then cut out.


Use your stocking template to guide placement of design. You might want to lightly mark points on the stocking to help you place the design pieces. Hot glue pieces in place.


If your design has more detail, cut out the next layer of pieces. Some small details may be better achieved with permanent markers or fabric paint. Allow drying time.


Again, use template to help place design pieces and glue in place.


Cut out any final details. These details may be better achieved with permanent markers or fabric paint. Allow drying time.


Select embroidery floss in chosen colour. Cut length and divide embroidery floss to use 3 strands (half). Thread sewing needle and knot 1 end.


Fold felt strip in half to form loop. Sew a few stitches to hold loop together. Place open loop ends between stocking layers and pin in place, lining stocking edges up. Starting at the top of the stocking with the loop, sew a few small stitches to hold all layers together. Once past loop, sew stocking together using a blanket stitch. Continue around stocking edges until you've reached the top on the other side. Secure your stitching with knot before cutting excess floss.


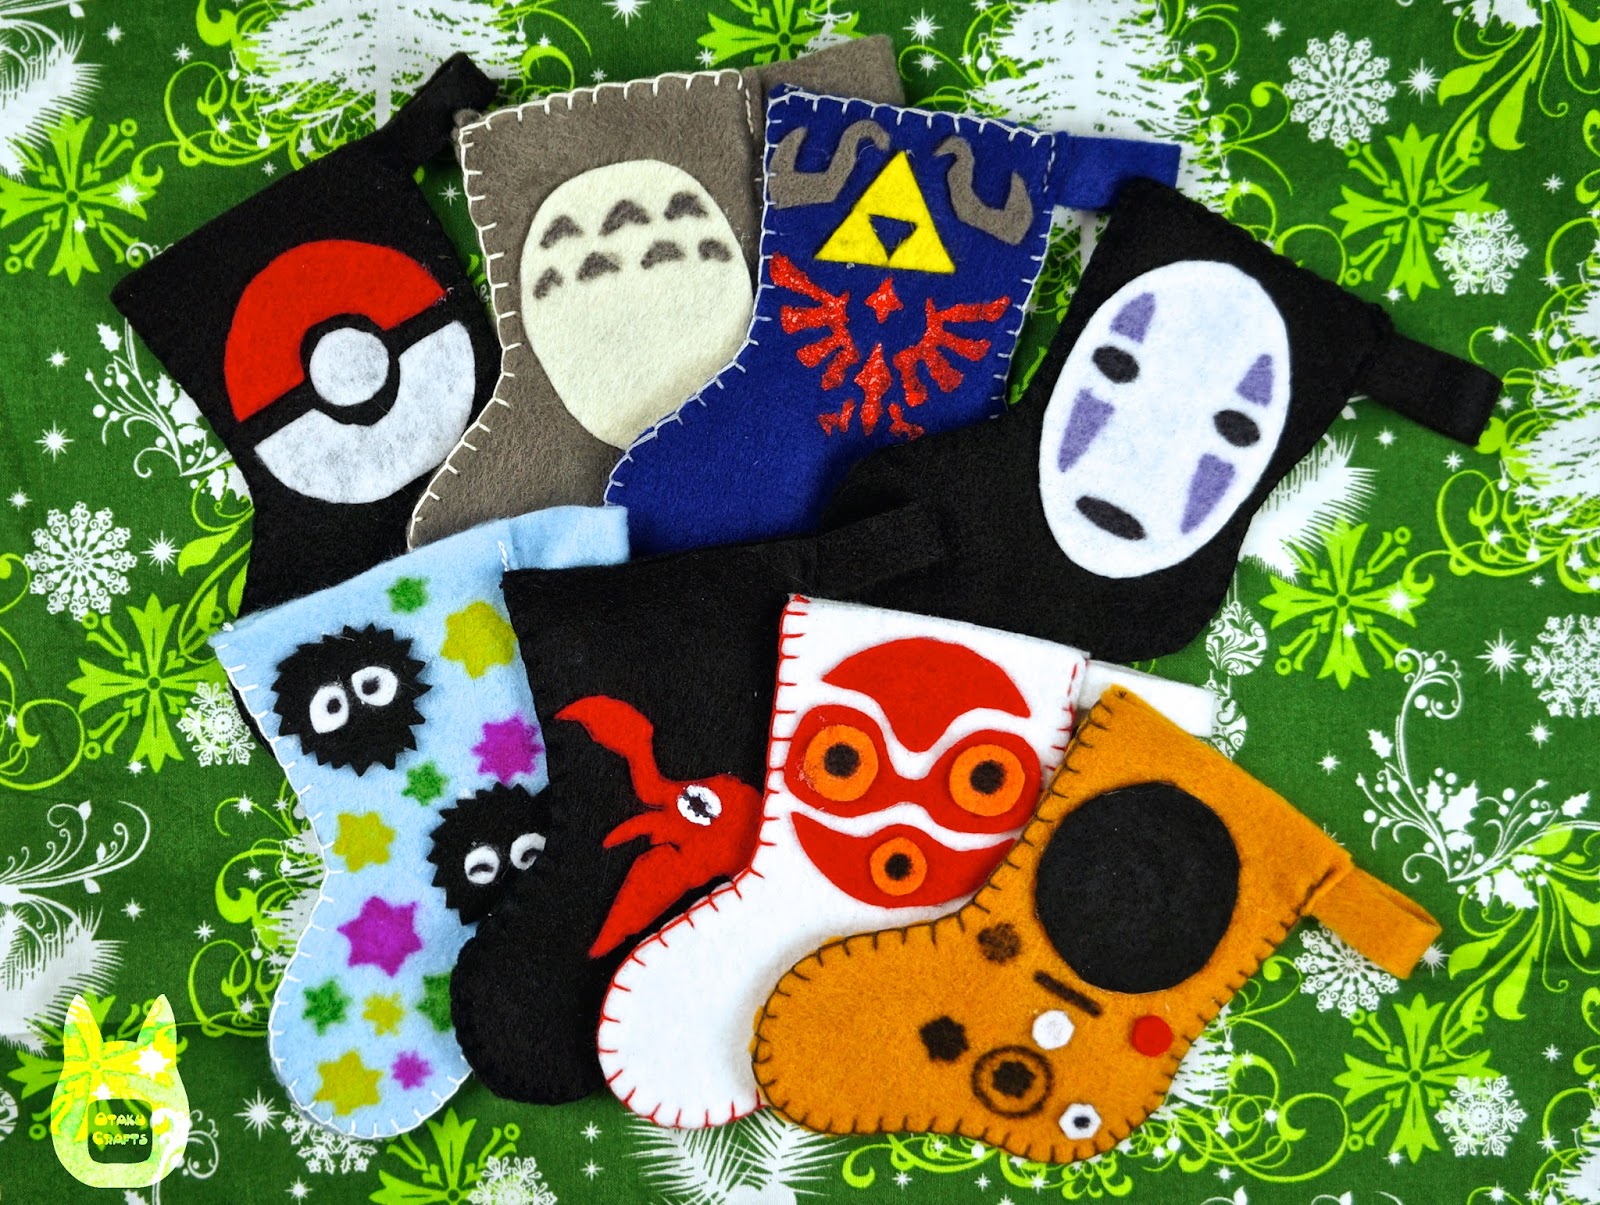
Now you have your finished stocking ready for stuffing with your gift card or simply hanging as a decoration.
Are you on Pinterest?
ReplyDelete